There’s a joke I’ve seen on the internet about how you have your Word document almost perfect, and you add an image, and it’s nearly right, and then…boom! Everything moves, your entire document is now in the wrong order, and you’re left pulling your hair and possibly starting over from scratch. It’s a joke I used to laugh at because, boy, did I feel that pain! But then I learned how to add images and move them around, and frankly, I got kind of mad at how darn easy it was and wondered why no one had told me sooner.
So, let me tell you.
First, you probably have some text, like so.
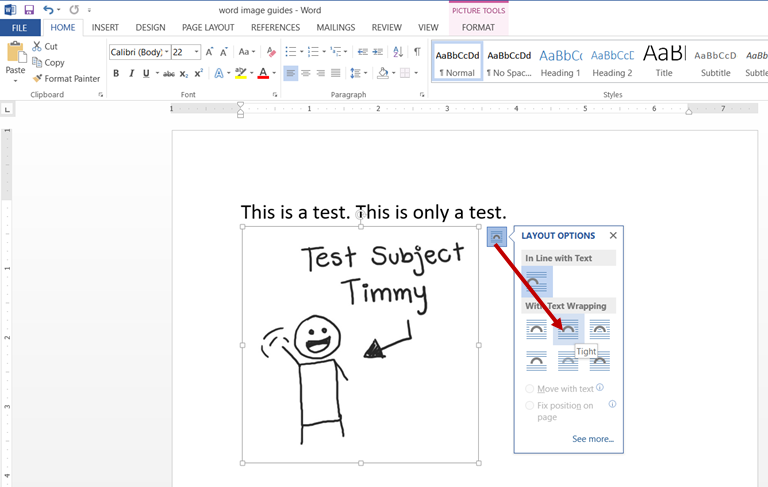
Then you paste in a picture or go up to the INSERT tab and add something from Online Pictures or add any sort of image—they all work the same. But when you add the image, have you ever noticed that little icon that pops up at the top right? That is your key for being able to move images, so click on that. There are several options, but if you want to be able to move that image anywhere you want, select the top middle icon—Tight.
Now you can click, hold, and drag the picture wherever you want. This trick works in any version of Word, but if you have Word 2013 or 2016, there’s more cool stuff to help you align the picture so you stay within the margins and make it match up with the text by using the Guides. Whenever you’ve clicked on an image, a new FORMAT tab appears, and toward the right end, there’s an Align option.
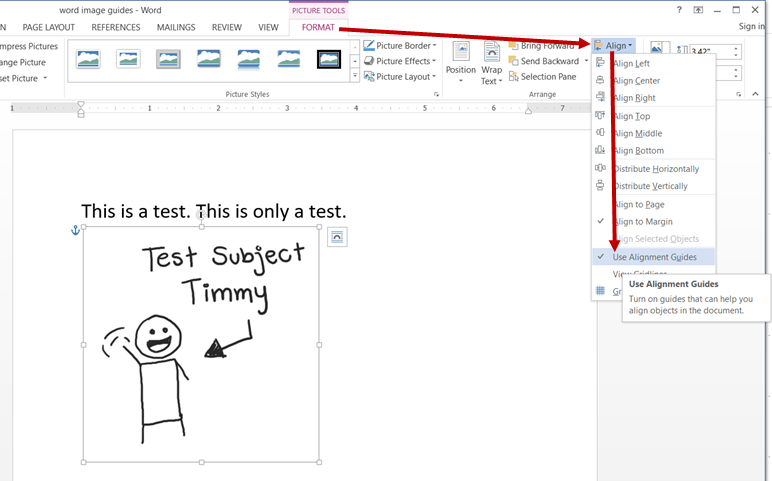
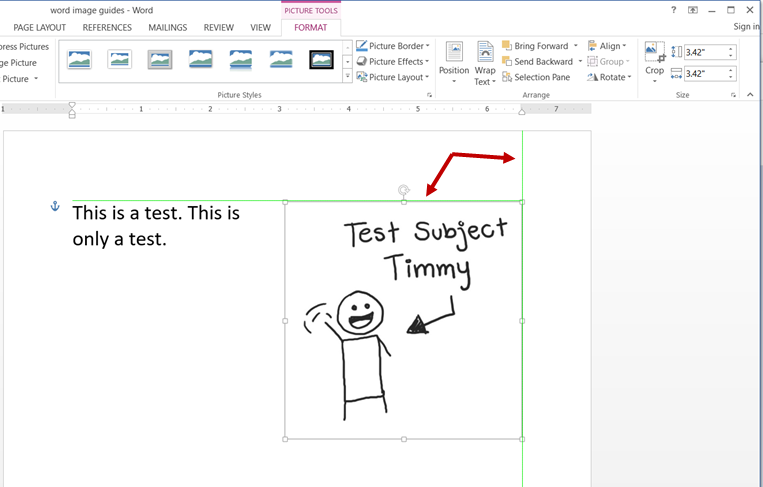
Make sure Use Alignment Guides is checked, and you get the fantastic green lines to help you get your image perfectly placed.
Shelia
Leave a Reply